Tuesday, May 16, 2017

CASology: Warm

Hello, everyone! I'm back today with a new cue from the CASology challenge!


When I think warm weather, I automatically think pineapples and flowers. I'm a tropical girl at heart! (Plus, I'm also a little bit obsessed with pineapples...)


This is a super simple card. Just one layer and only stamping!

1. I started my card by stamping the yellow base of my pineapple and then the green stem.
2. I stamped the pineapple detail over the top with some light brown ink.
3. I positioned the sentiment so that it was slightly overlapping my image and then stamped it twice in dark brown ink (the first stamping was a little splotchy).
4. I felt that it was missing a little something, so I added a pink flower at the end of the sentiment.

That's it! Super fast to make and an absolutely sweet encouragement card! Thanks for joining me today and I can't wait to see how you're inspired by our cue!


Thursday, May 11, 2017

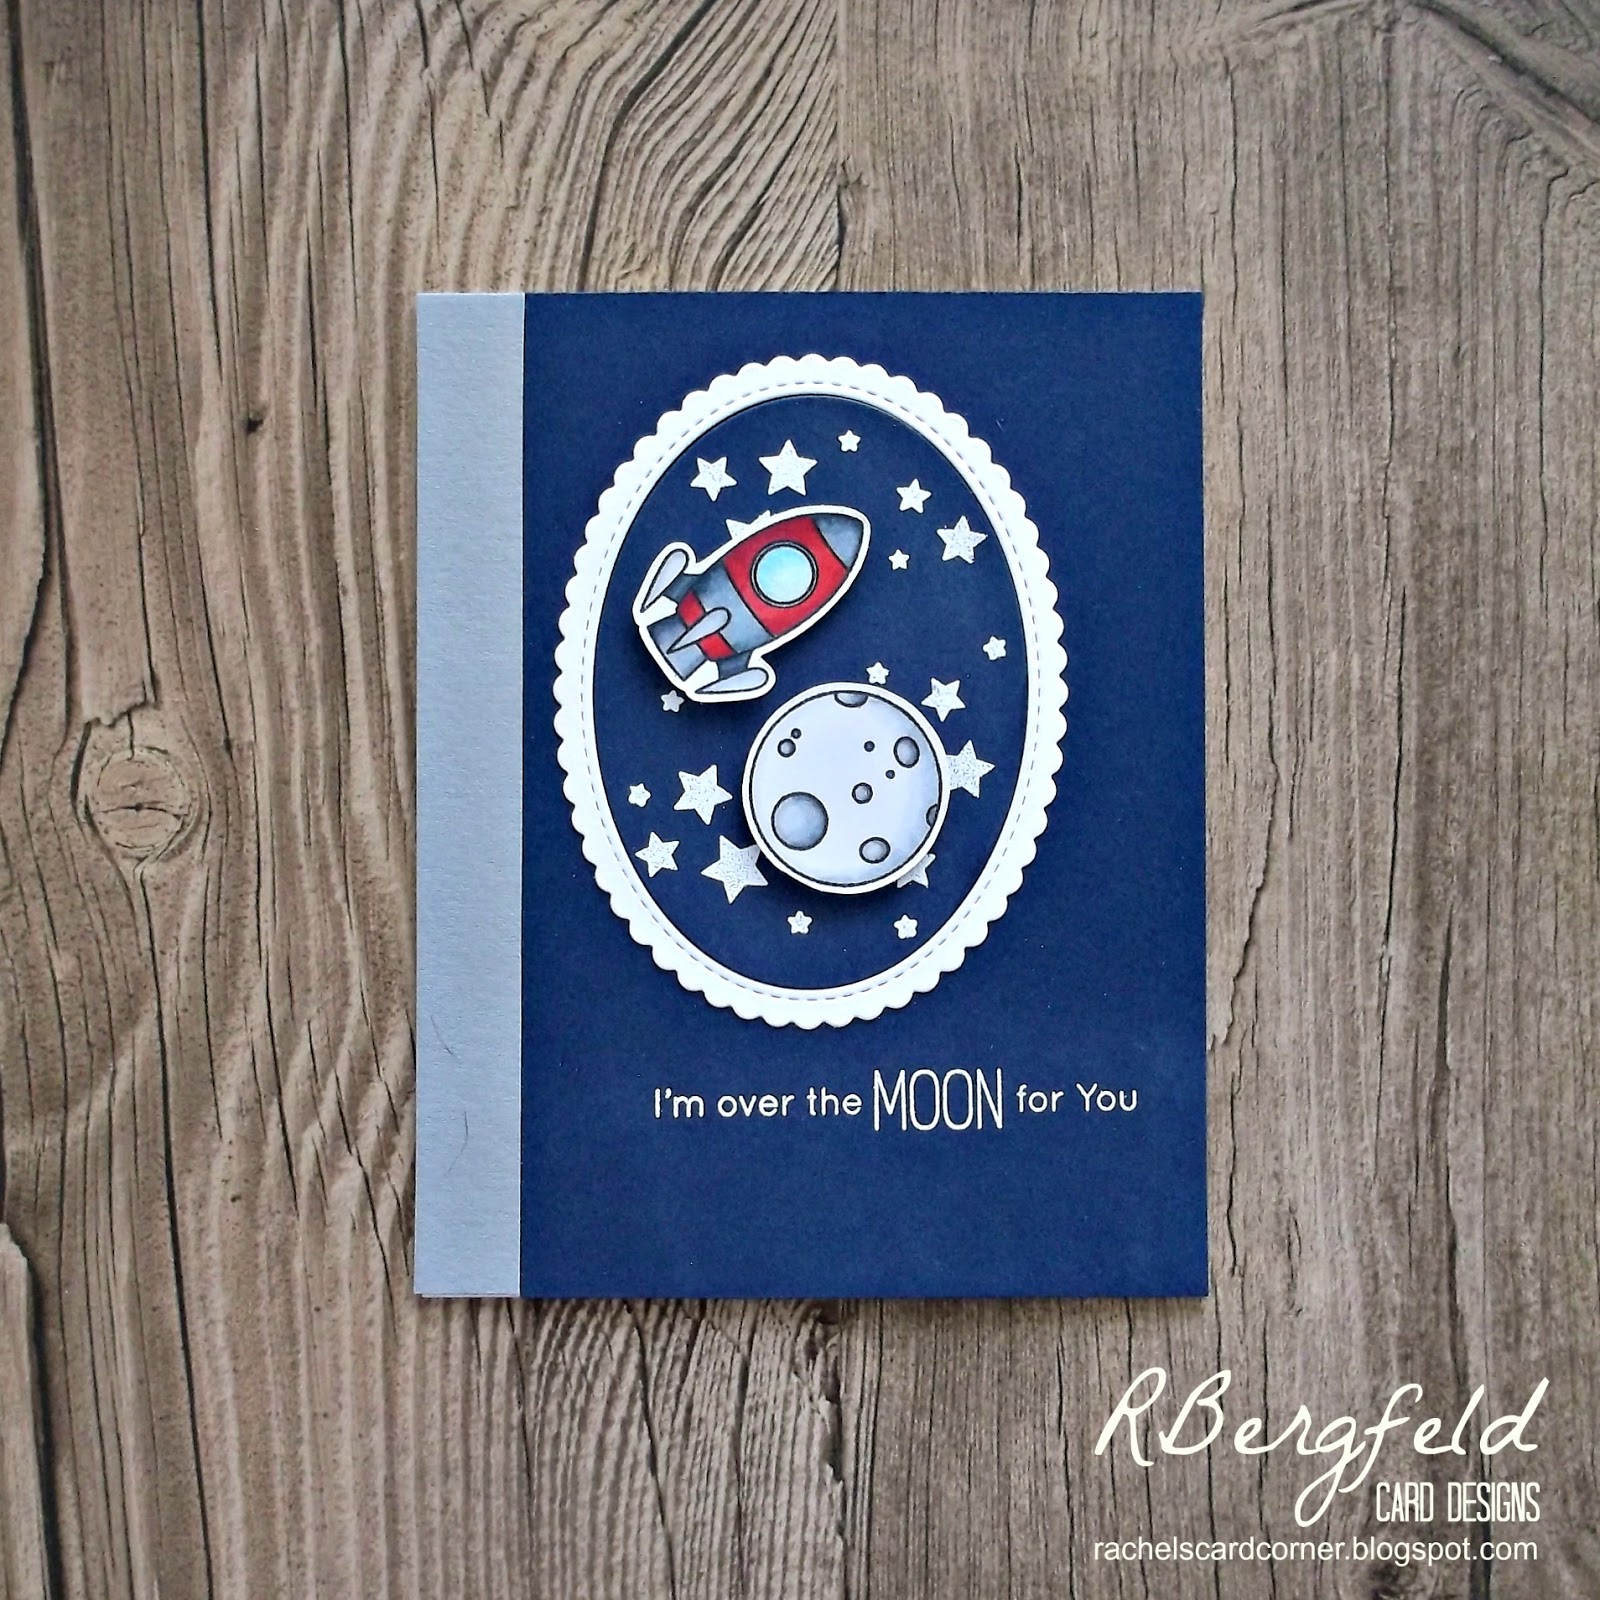
Over the Moon

Oh my goodness! For the first time in a long time, I made a card because I wanted to and not because of a deadline! It's been a while since my mojo has shown its head around here!

Today, I'm playing along with the MFT Stamps Sketch Challenge.


For some reason, this sketch made me think of a window to the stars. So I took that idea and ran with it.


1. I cut a card base from white cardstock and set it aside.
2. I cut a piece of Navy cardstock to the size of an A2 card front and then trimmed 1/2 inch from the side.
3. I adhered that piece to the front of my card base.
4. I cut a 1/2 inch strip of gray cardstock and adhered it beside my navy one on my card front.
5. I used a stitched scallop frame to cut a frame from white cardstock and navycardstock.
6. I heat embossed white stars onto the center piece from my navy frame and then adhered it where I wanted it on my card front.
7. I adhered my white frame around the navy oval piece.
8. I stamped my sentiment in Versamark ink and heat embossed it in white embossing powder.
9. I stamped my images with black ink and then colored them with my copics.
10. I used my Brother Scan N Cut 2 to cut them out with a small white border.
11. I adhered my images to my card front using foam tape.
12. I added a tiny bit of clear Wink of Stella to the window on my spaceship for subtle bit of shine!

That's all! Easy-peasy but so cute! Thanks for joining me today!


Tuesday, May 9, 2017

CASology: Commencement

Hello! There's a brand new cue from CASology today!


I'll be honest, I don't really have a whole lot of graduation style stamps in my collection. My oldest nephews are 12 and my cousins have all already graduated, so it's just not something I make a lot of. With that in mind, I made a rather generic card that would also work for graduation!


1. I cut a panel from white cardstock with a Stitched Rectangle die.
2. I used my MISTI to stamp my  Rose in the corner of the panel.
3. I re-stamped my rose on some masking paper and cut it out to place over my original image.
4. I stamped my leaves surrounding my rose and then removed the mask.
5. I colored my rose and leaves using my Copics (Y08, Y04, Y00, and Y000 for the rose and YG01, YG13, and YG15 for the leaves). I also added a halo around my image with some cool grays (C03, C01, and C00).
6. I stamped my sentiment on top of my image with some Versamark ink and heat embossed in gold embossing powder.
7. I adhered my panel directly onto a card base using some double-sided tape.

Easy-peasy! I hope you're inspired to join us this week!


Sunday, May 7, 2017

Tuesday, May 2, 2017

CASology: Flow

Hello, everyone! I'm back today with some inspiration for the newest cue from CASology!


I immediately thought of water when I heard the word flow and this sweet mermaid image is perfect with her flowing hair!


1. I started my card by cutting a card base from Neenah Solar White card stock.
2. I used my Waves Stencil to sponge Sea Glass ink onto 1/3 of the card (rule of thirds!).
3. I stamped my mermaid on some scrap paper and then colored her in with my Copics.
4. Because I'm lazy and hate fussy cutting, I used my Brother Scan N Cut 2 to cut my mermaid image out with a slight white outline around her.
5. I positioned my mermaid roughly where I wanted her so I could position my sentiment and used my MISTI to stamp it.
6. I adhered my mermaid image with some foam tape to add a little bit of dimension.

I can't wait to see how you're inspired by our cue this week!